

Language:
Español
More info:
FAQ
Bibliography
Peperina team
Other kayaks
Links
Kayakers
Products
I used the lightest woven 'cloth' I found. This was near the 4 - 6 ounce considered optimum by several sources. (250 gr/m2)
The length needed depends on the width available. It's quite ok to slightly rotate the cloth. This way it's possible to save length by cutting out the two largest pieces partly 'overlapping'. On the other hand, if you cannot obtain glass tape (like me), you'll need extra glass to cut them yourself. When cutting the cloth to cover the deck and bottom, leave at least 5 cm all around.
HINT: when the epoxy has almost hardened, using a sharp knife, cut through the tape (see photos), and use the tape to remove the cut cloth. That way, the border will be neatly cut. Don't forget the cloth has to cover the sheer (border) of the kayak, leave at least 3 cm!
Of course, before covering the deck, it's necessary to make the final
decision on the size. Check [WWW::link abert.en.php "the next page"]
for the solution I adopted. Roam the 'net to find other ideas...
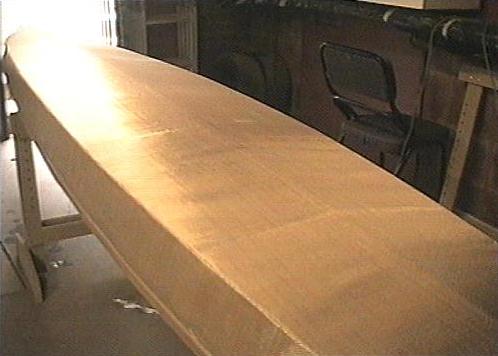
Then cover the deck. The double covering of the deck-to-bottom joint
will make a solid union.

|
Before applying the glass cloth - even before the sanding - fill all
imperfections with an epoxy-wood dust mix. Then sand - first 80 grain,
then 120. It's not necessary to use finer paper. Sand EVERYWHERE! Sanded/
non-sanded areas will have different color after epoxying!
|

|
|
|
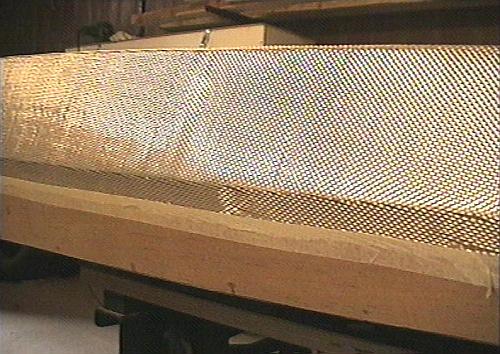
Drape the cloth over the bottom (preferable to practice with this side!). Leave about 5 cm over the border (sheer). |
|||
|
To help applying the resin, I taped the cloth to the hull with masking
tape. I'm ambivalent about this method. While applying epoxy, the cloth
seems to stretch just a little, and the tape makes moving it impossible.
On the other hand, applying is a lot easier!
|
|
|
|
It sure is neat, with the tape! The tape also helps to keep the cloth stretched near the borders. |
|||

|
Apply the epoxy. Don't try and prepare the mix for the complete surface!
The more epoxi mixed, the faster it hardens. I worked with batches of
about 150 gr (one plastic cup). Use gloves!
|

|
|
|
Don't pour the resin directly on the cloth (contrary other advice). I've found that pouring leaves differences in colour too. Make haste slowly. Eliminate all bubbles. |
|||

|
Bubbles are difficult to avoid near the borders, especially if you left
them as sharp as I did. It would probably have been better to round them
to a 3 - 4 mm radius.
|

|
|
|
Don't use more epoxy than necessary. Saturate the cloth, no more. More layers can be added later. |
|||

|
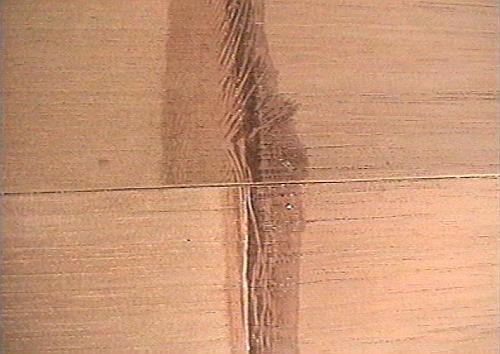
Repairs and fills, which were visible before the cloth...
|

|
|
|
...almost disappear after the coating! |
|||
|
Another example, where the panels were glued together...
|

|
|
|
...almost magic, isn't it? |
|||

|
Another bubble zone is near the bow/stern. The sharp border is very
difficult to get the cloth glued to the wood.
|

|
|
|
Improvise: I use 'Saran'-style foil wrapped firmly around the area, pressing the glass to the wood. |
|||
| (c) John Coppens ON6JC/LW3HAZ |